DARE SRP Rocket Project
Project Overview
The Small Rocket Project (SRP) is an initiative by DARE (Delft Aerospace Rocket Engineering) that introduces students to rocket engineering fundamentals. The challenge: launch an uncooked egg to 1 kilometer altitude and recover it safely.
Primary Goals
- Reach 1 kilometer altitude
- Safely recover an uncooked egg
- Complete recovery within 90 seconds
- Land within designated zone
Secondary Goals
- Record footage with 2 ESP32 camera's
- Log flight data to flight computer
- Get telemetry data from flight computer during flight with ground station
Technical Implementation
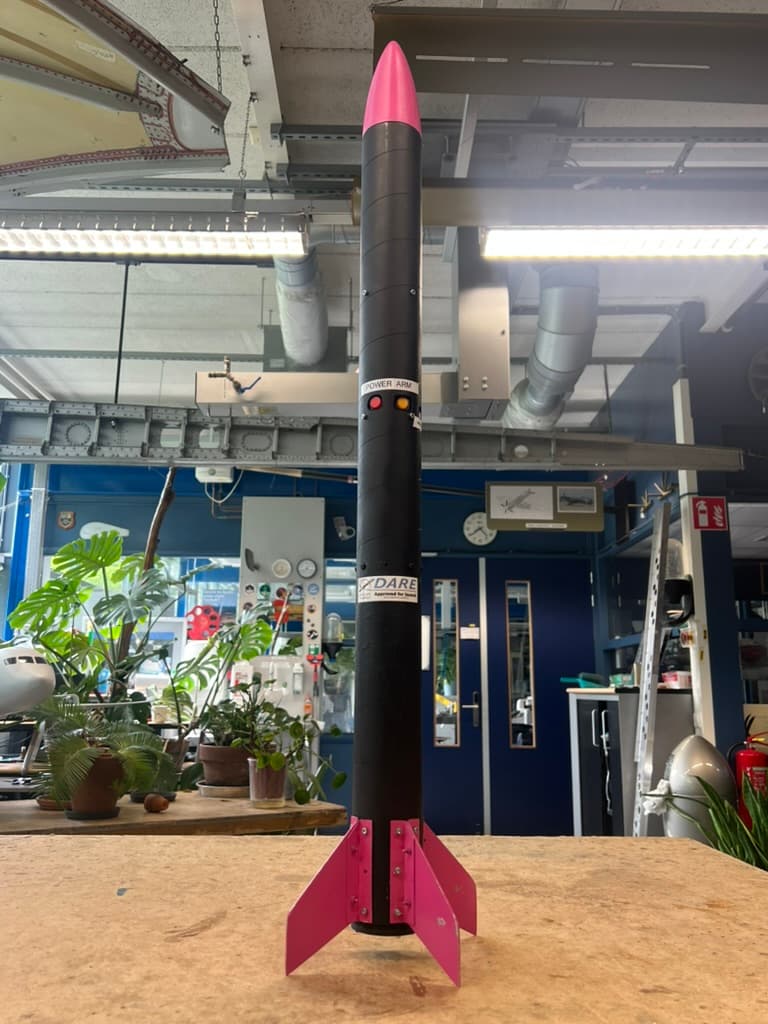
Rocket Structure
- 60mm phenolic tube body (1m long)
- Sheet metal fins for stability
- Nose cone with egg protection system
- Custom-designed and sewn parachute
- Kevlar shock cord for parachute attachment
- Pyrotechnic charge for parachute deployment at apogee
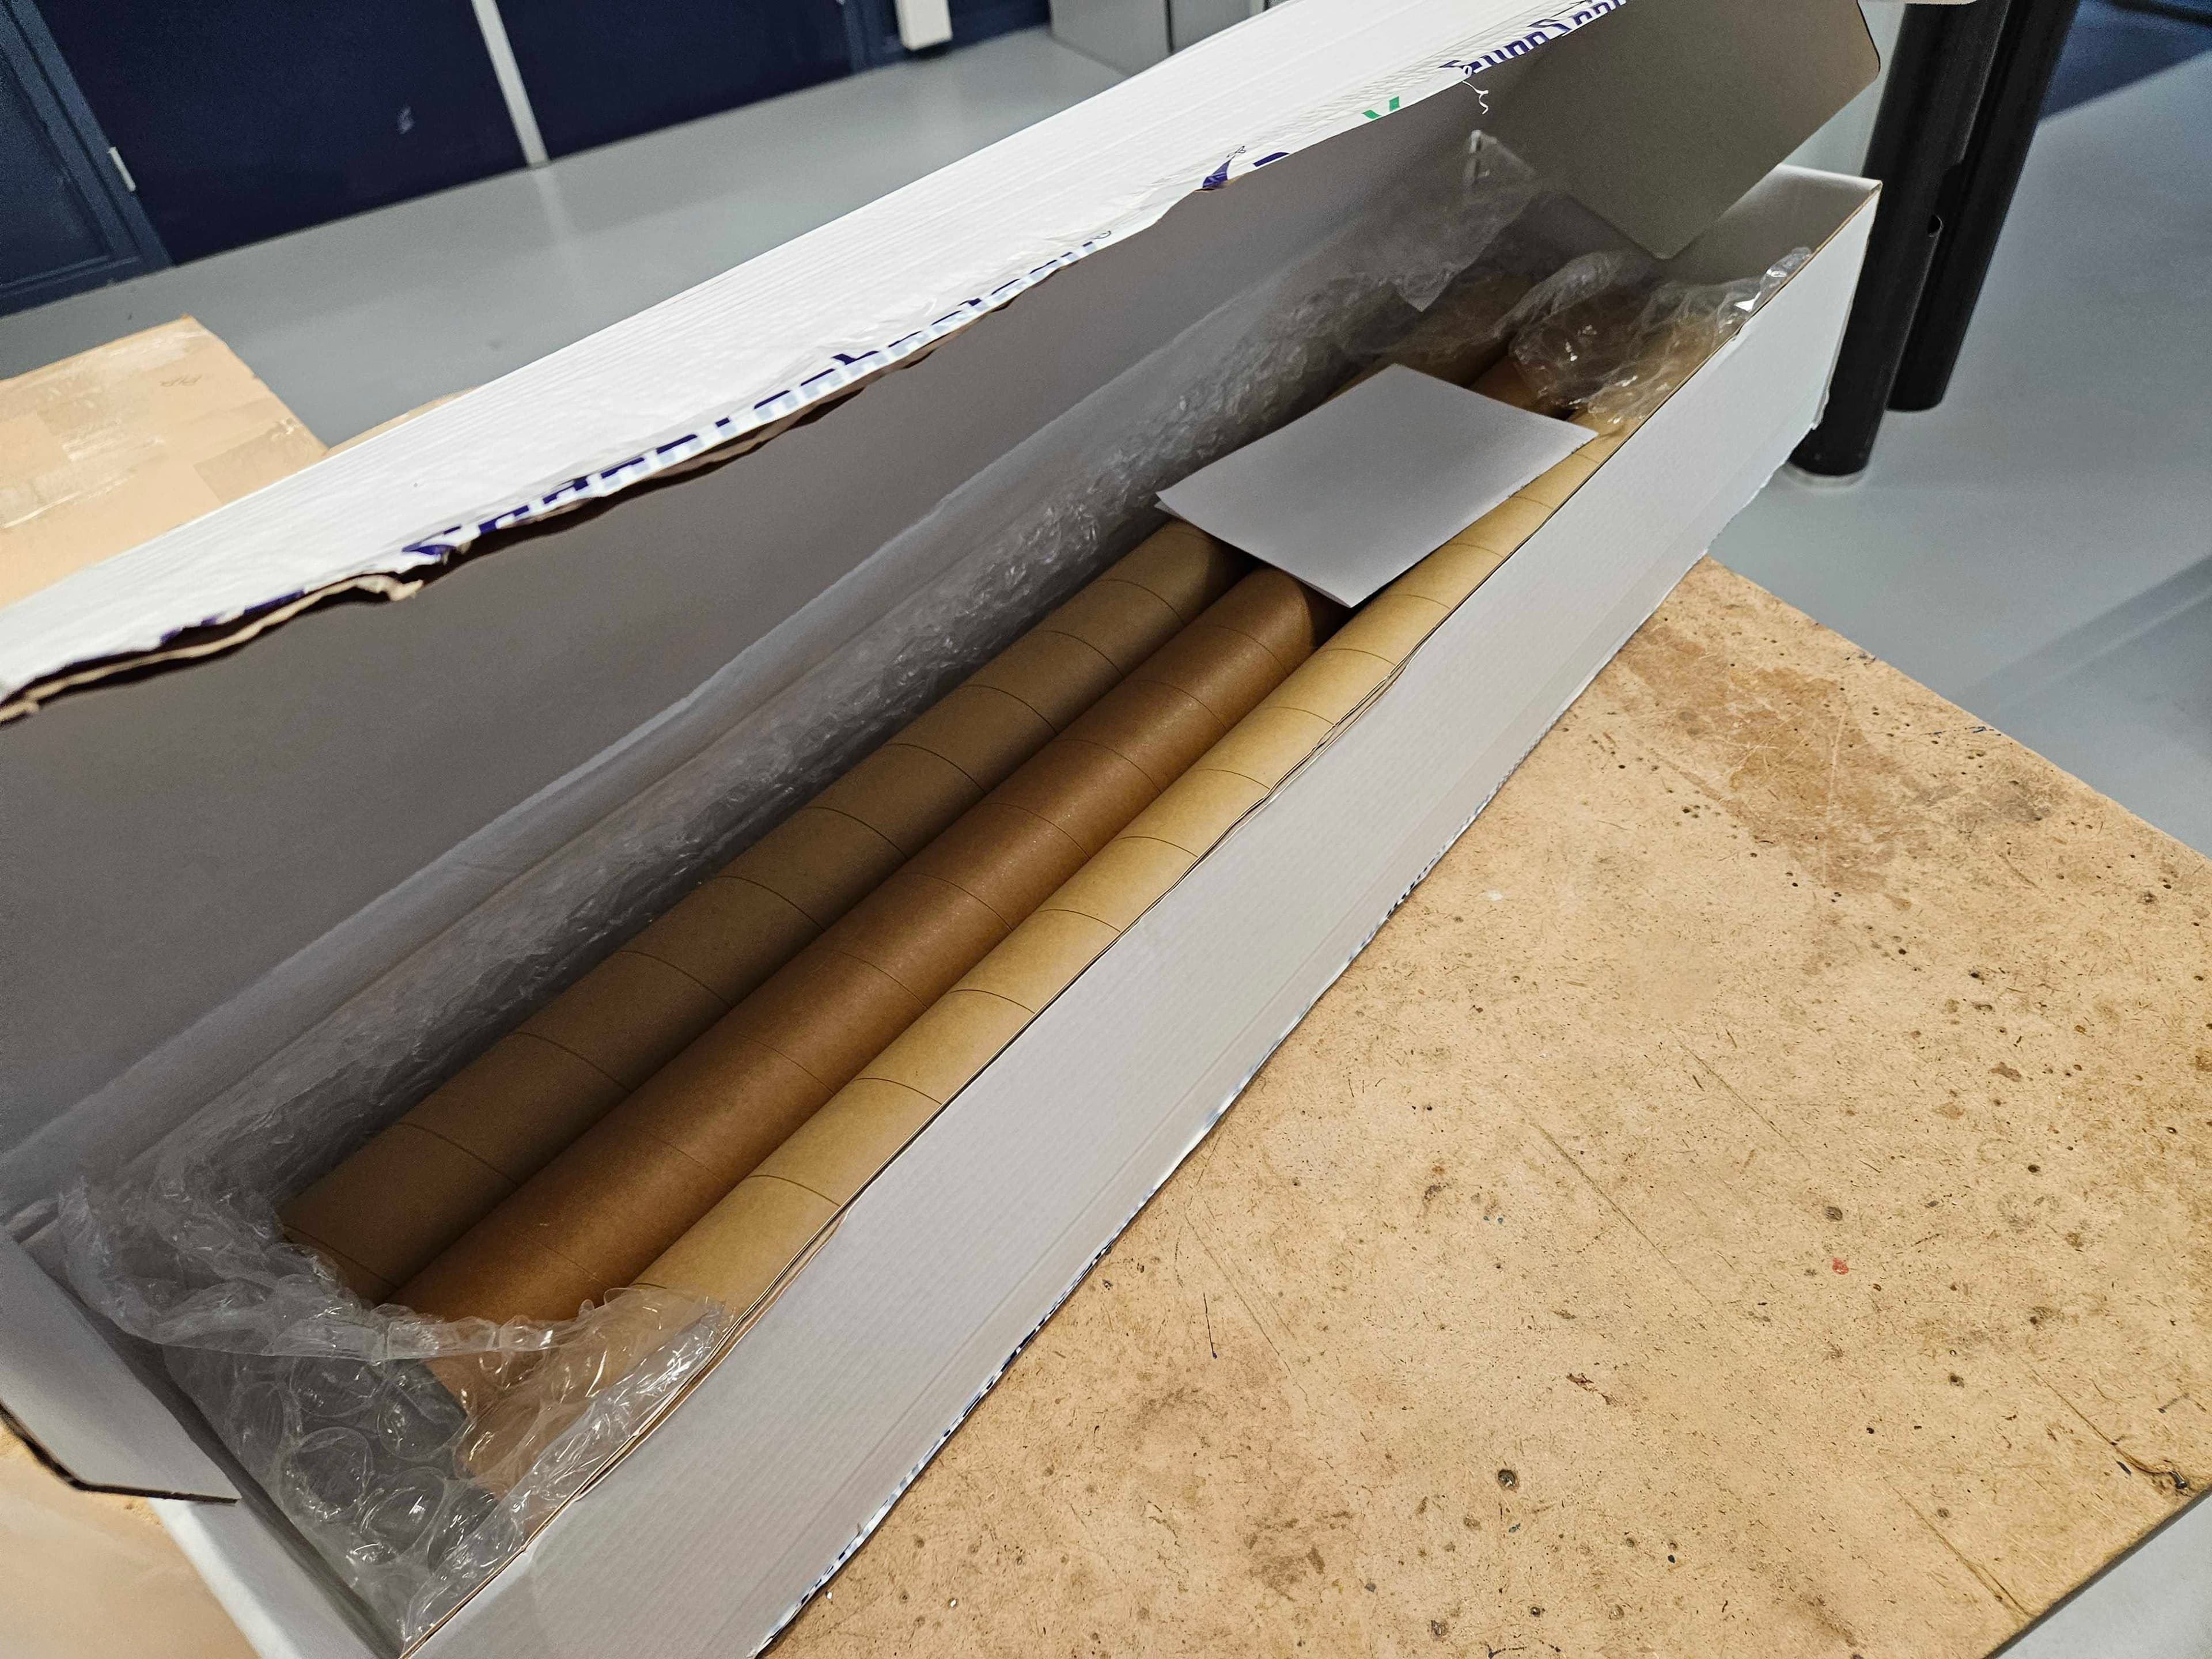
Phenolic Tube
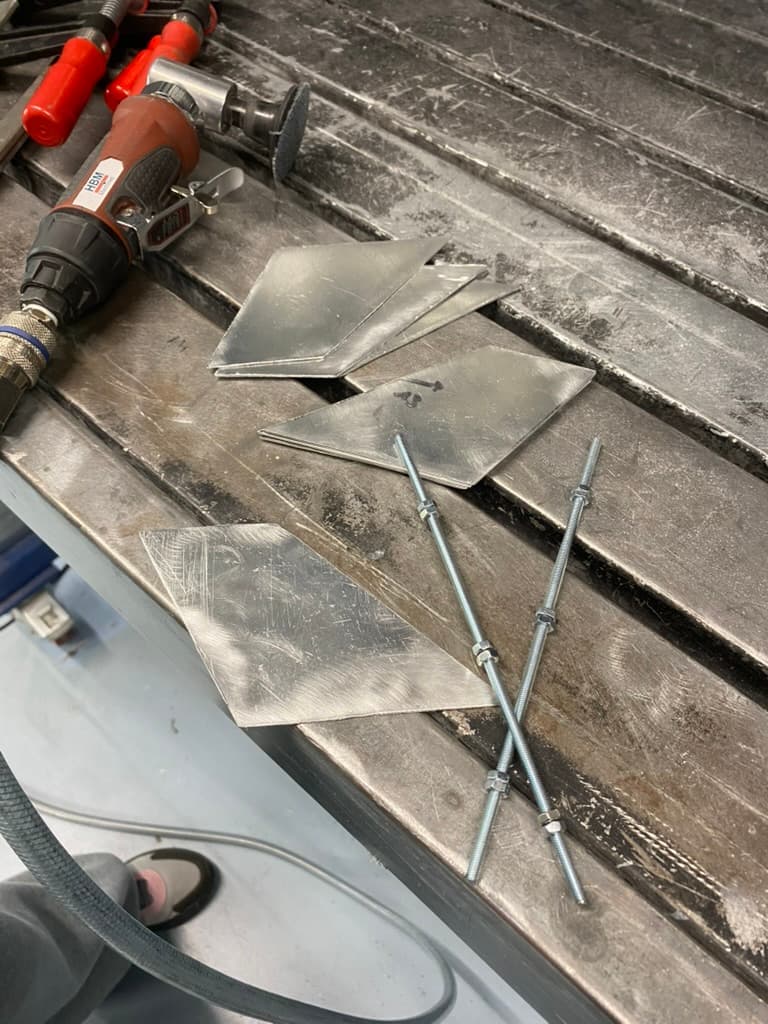
Fins
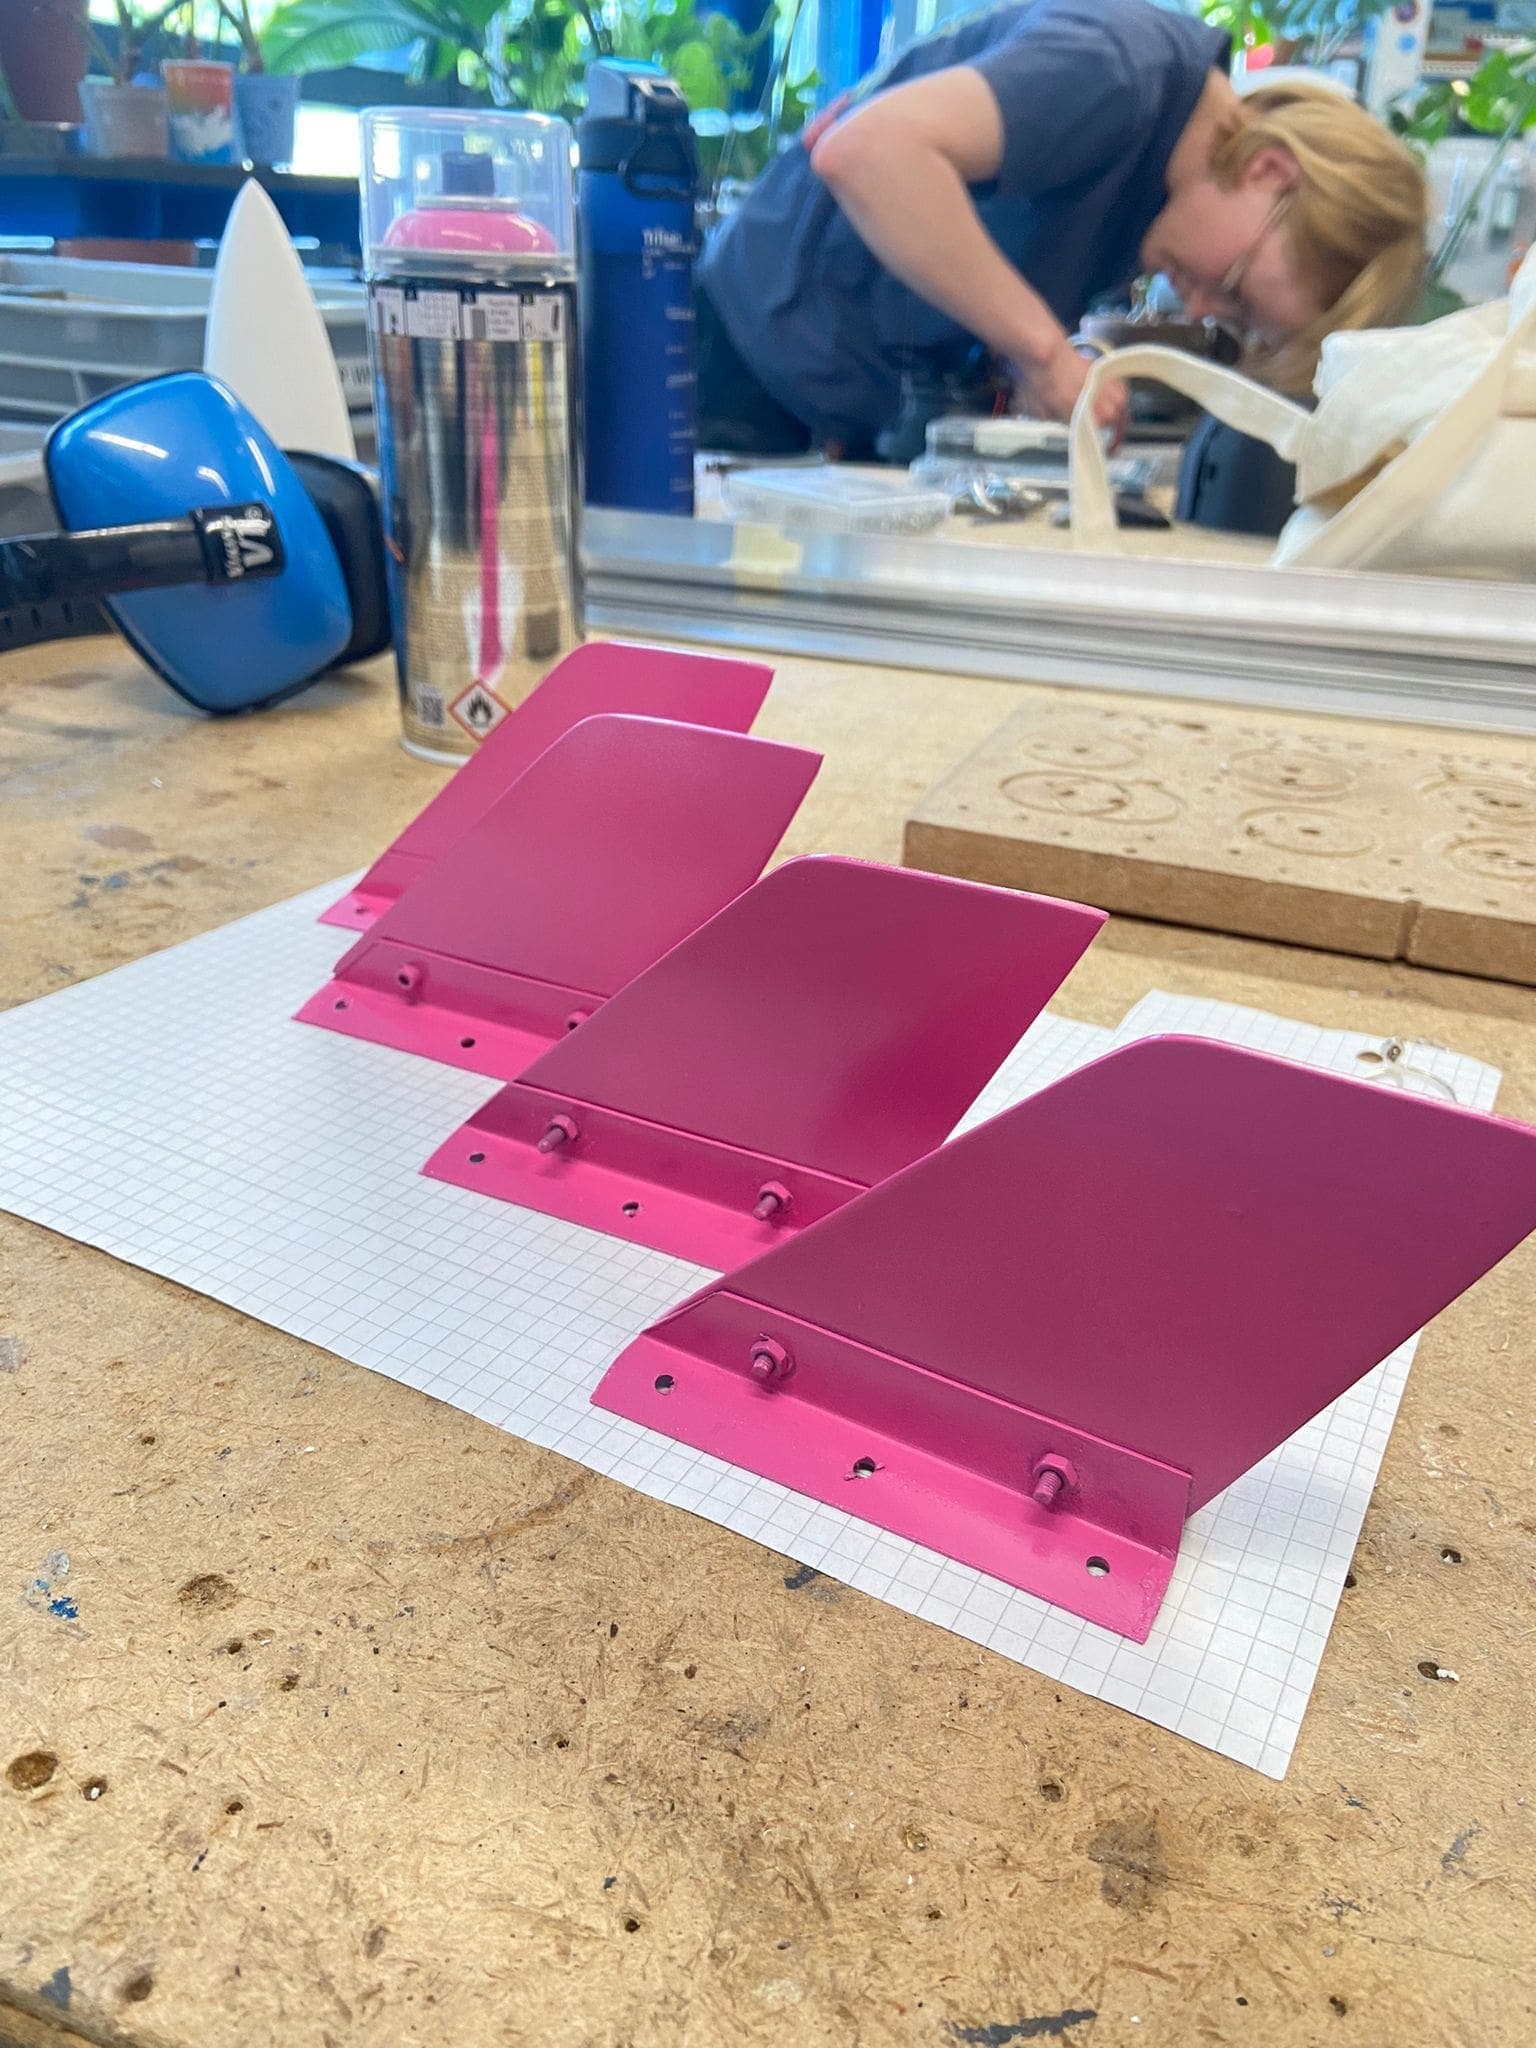
Finished Fins
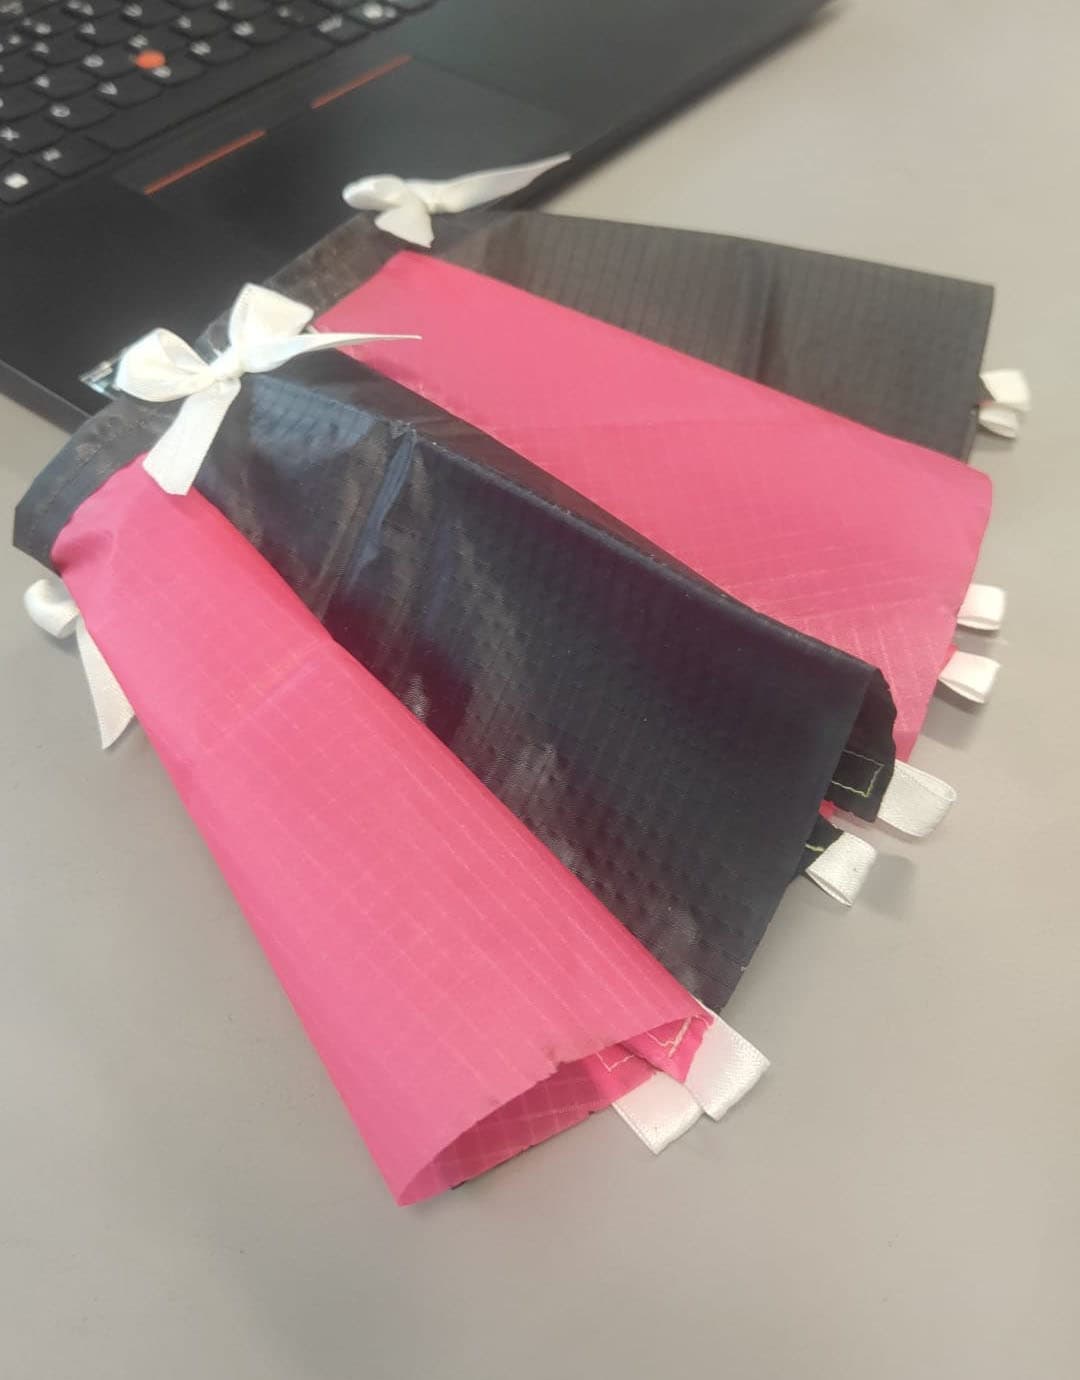
Parachute
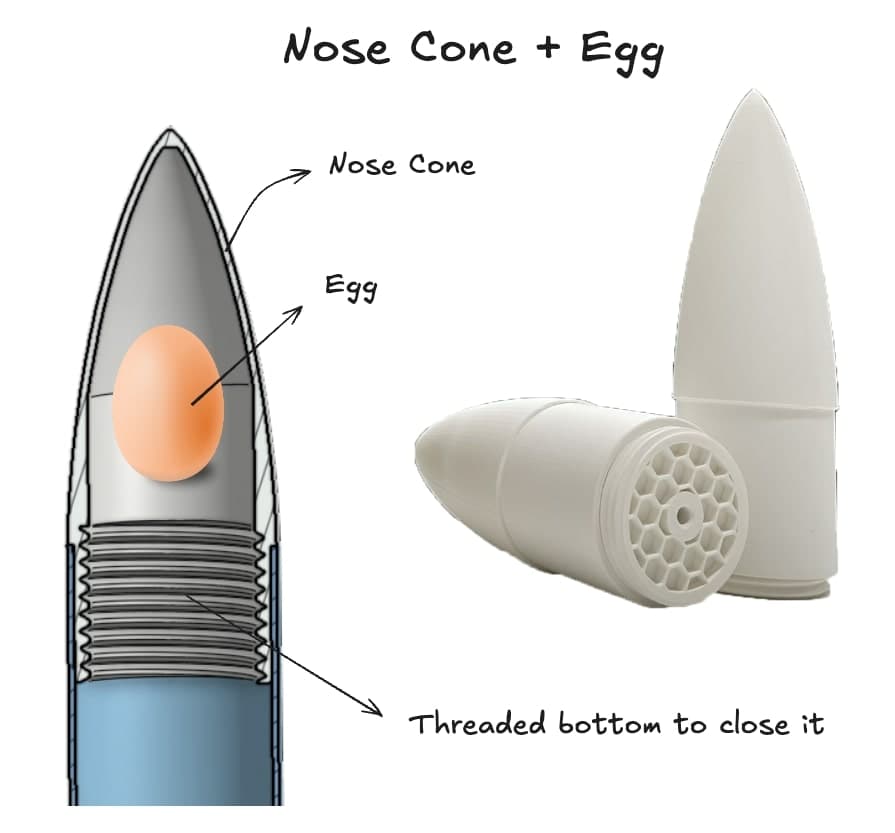
Nosecone with egg protection system
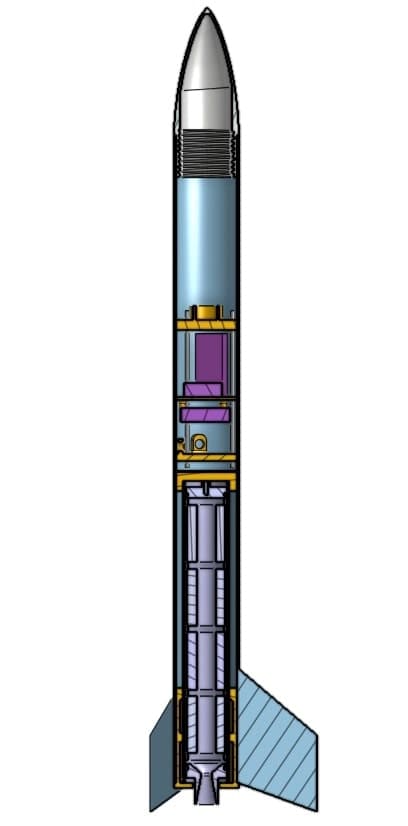
CAD
With the team we were comparing possible materials to use for the rocket body. Aluminum rolled sheets, fully 3D-printed, phenolic tube, or cardboard tube with metal rods were considered. The phenolic tube was chosen because it would simplify the development of the rocket. It was strong, not too heavy, and easy to work with. The only downside was that it was very hard to find online, and the price was a bit high.
The fins were made of aluminium sheet metal. They were designed to provide stability during flight, by limiting the passive stability within the limits recommended by the DARE safety team. The fins could not be too big because then they could make the rocket overstable. You want a rocket to fly straight up into the sky, but an overstable rocket will fly into the wind because the big fins counteract any change in direction, thus flying into the direction it has when it leaves the launch tower. While a normal rocket will allow gravity to pull the rocket body straight during flight. A healty static margin of around 1.5 to 2.5, between the center of gravity and the center of pressure, was optimal for the rocket. These values is in "calibers" which is a unit of length equal to the body tube diameter. The design shape of the fins themselves were kind of eyeballed, and then later optimized with the "OpenRocket optimizer" to improve the altitude we could reach.
The hemi-spherical parachute was custom-designed and sewn, and is attached to the rocket using a kevlar shock cord. This shock cord is resistant to high temperatures from the pyrotechnic charge and it can also handle the force from the nosecone being shot off during parachute deployment. Sizing of the parachute is a difficult because you want to come down to the ground as slow as possible, but also not too slow because then the rocket will spend a lot of time in the air. This means the wind can push the rocket sideways outside of the landing zone. A limit of 90 seconds flight time was set. Our calculations showed we would decent at a rate of 20m/s, which was reasonable.
We found some reference literature, and OpenRocket to figure out the area and Cd (Coefficient of Drag) we needed. We ended up with a parachute with a projected diameter of 29 cm and a Cd of 1.2. The parachute was connected to suspension lines that came together into a swivel, to allow the parachute to rotate without tangling. It also featured an apex vent to stabilize descent by allowing controlled airflow. The parachute was made of a nylon fabric, and together with the kevlar shock cord weighed 40 grams.
The egg, our primary payload, was placed inside the nose cone. Together with our "Egg protection system" as we called it. It was actually just popped spelt. The spelt was chosen because it is a good cushioning material and it is easy to find. Unfortunately the spelt was not enough to protect the egg from the landing, because we landed (crashed) a bit to fast... eeuh maybe at like 200km/h... More on that later.
Electronics System
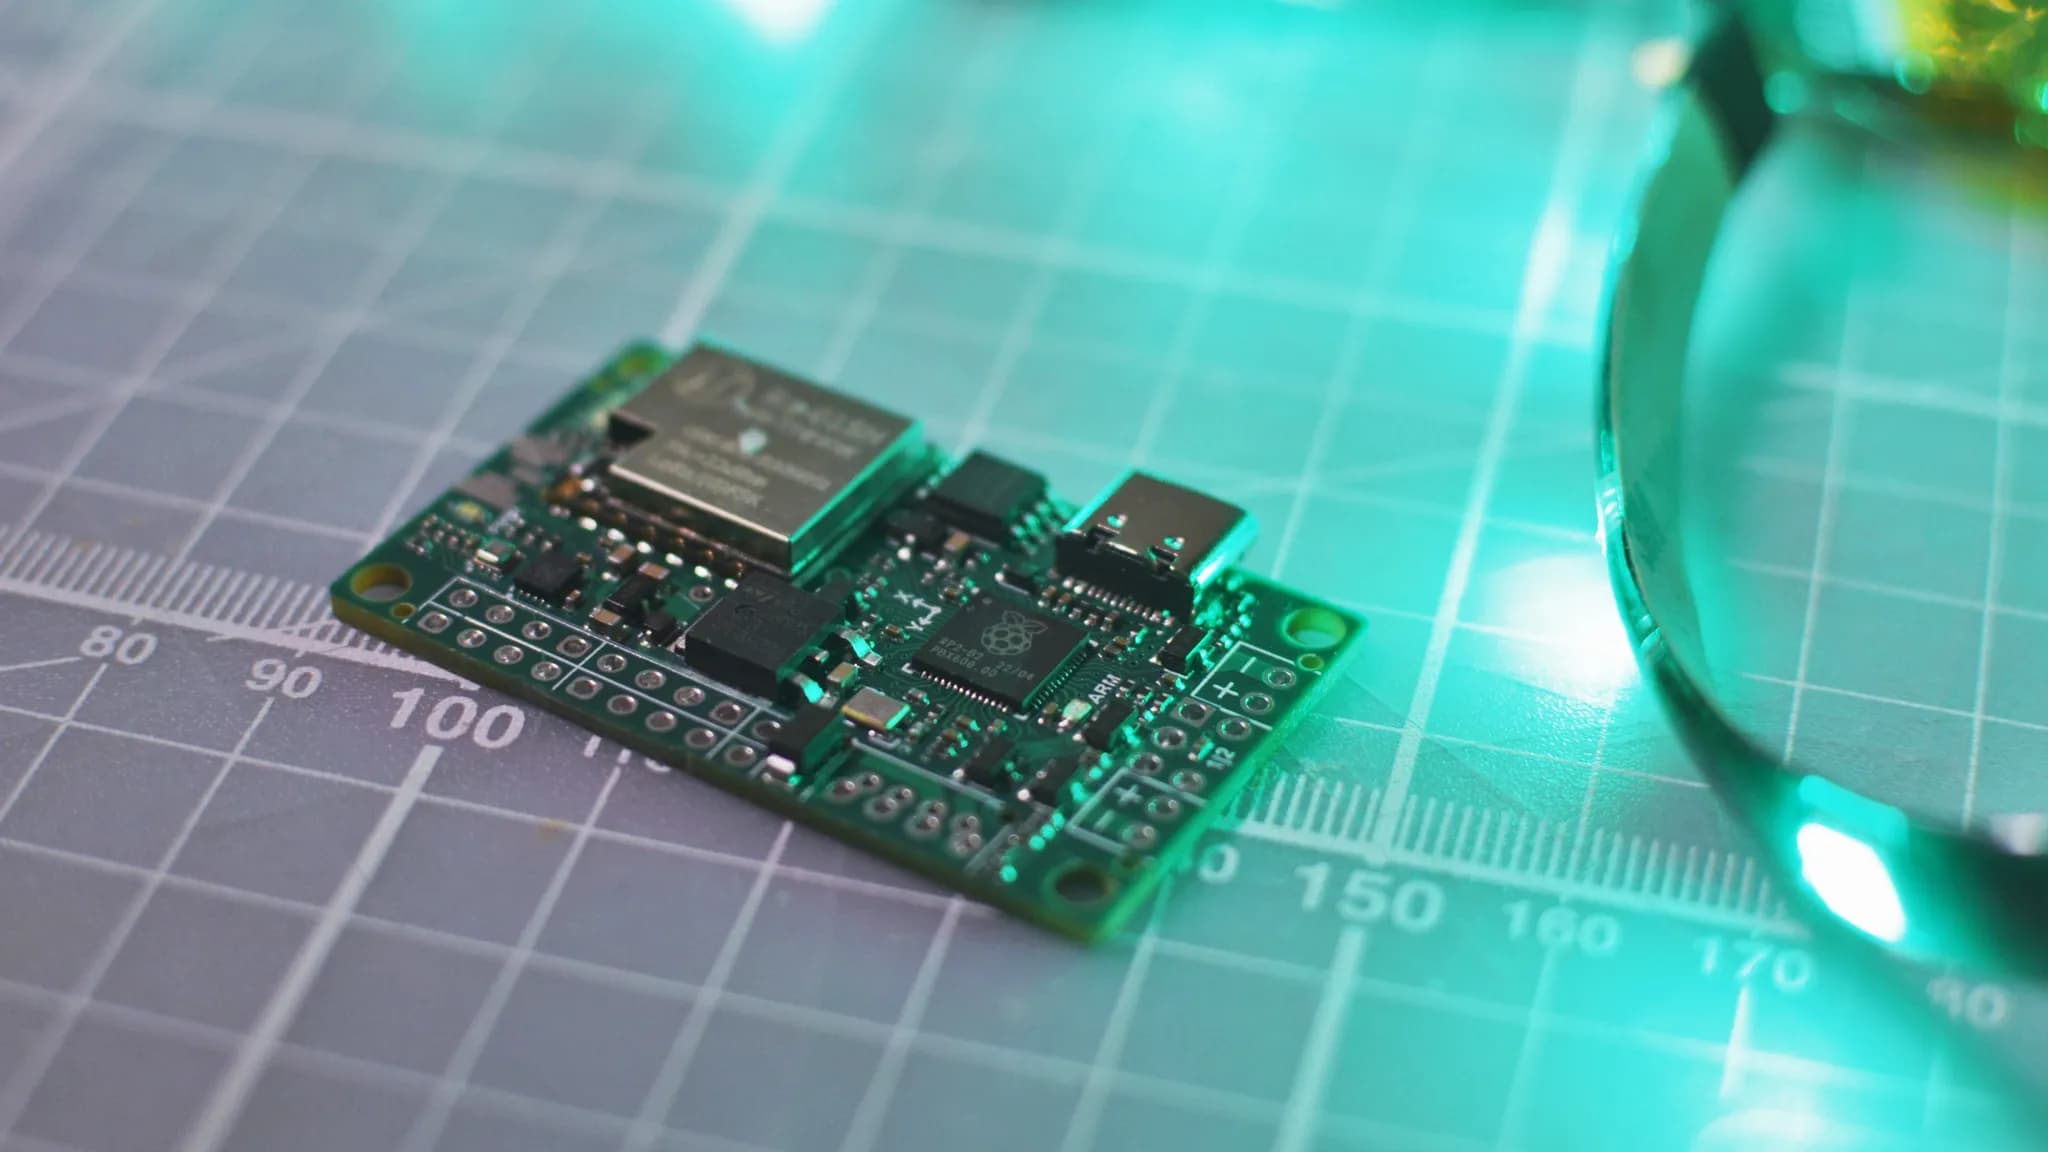
The rocket uses the Kolibri flight computer, featuring:
- RP2040 dual-core ARM-based controller
- 868 MHz telemetry, up to 150 mW transmission power
- Barometer (BMP388) and IMU (LSM6DS) for flight data
- Onboard flash storage, for storing flight data
- Pyro channel continuity checking
- Integrated power management
- Optional GPS capability
The other electronics we used where:
- 2 ESP32 camera's
- 1600mAh 2S LiPo battery
- Stepdown converters
- 2 Switches with LEDs
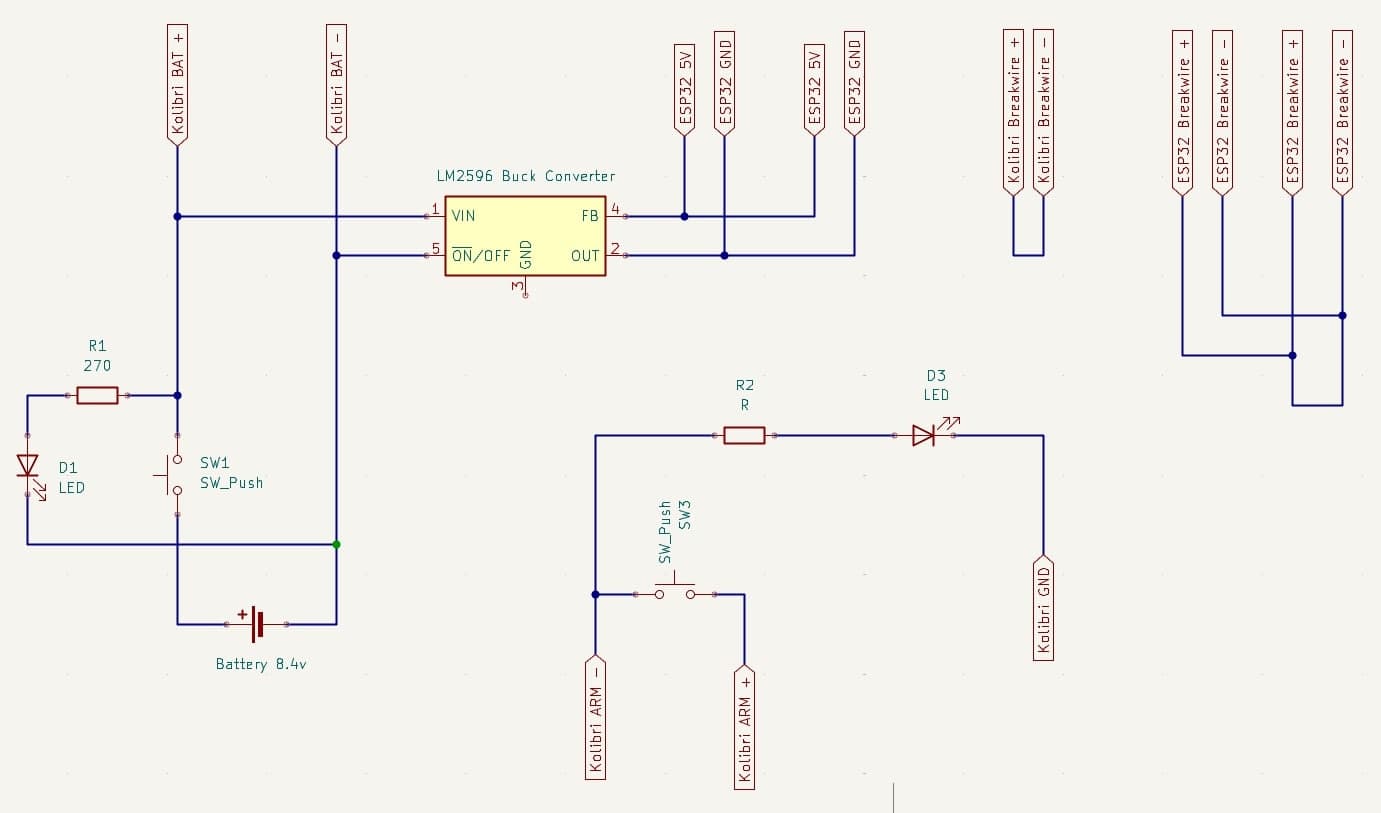
Schematic
Kolibri Board
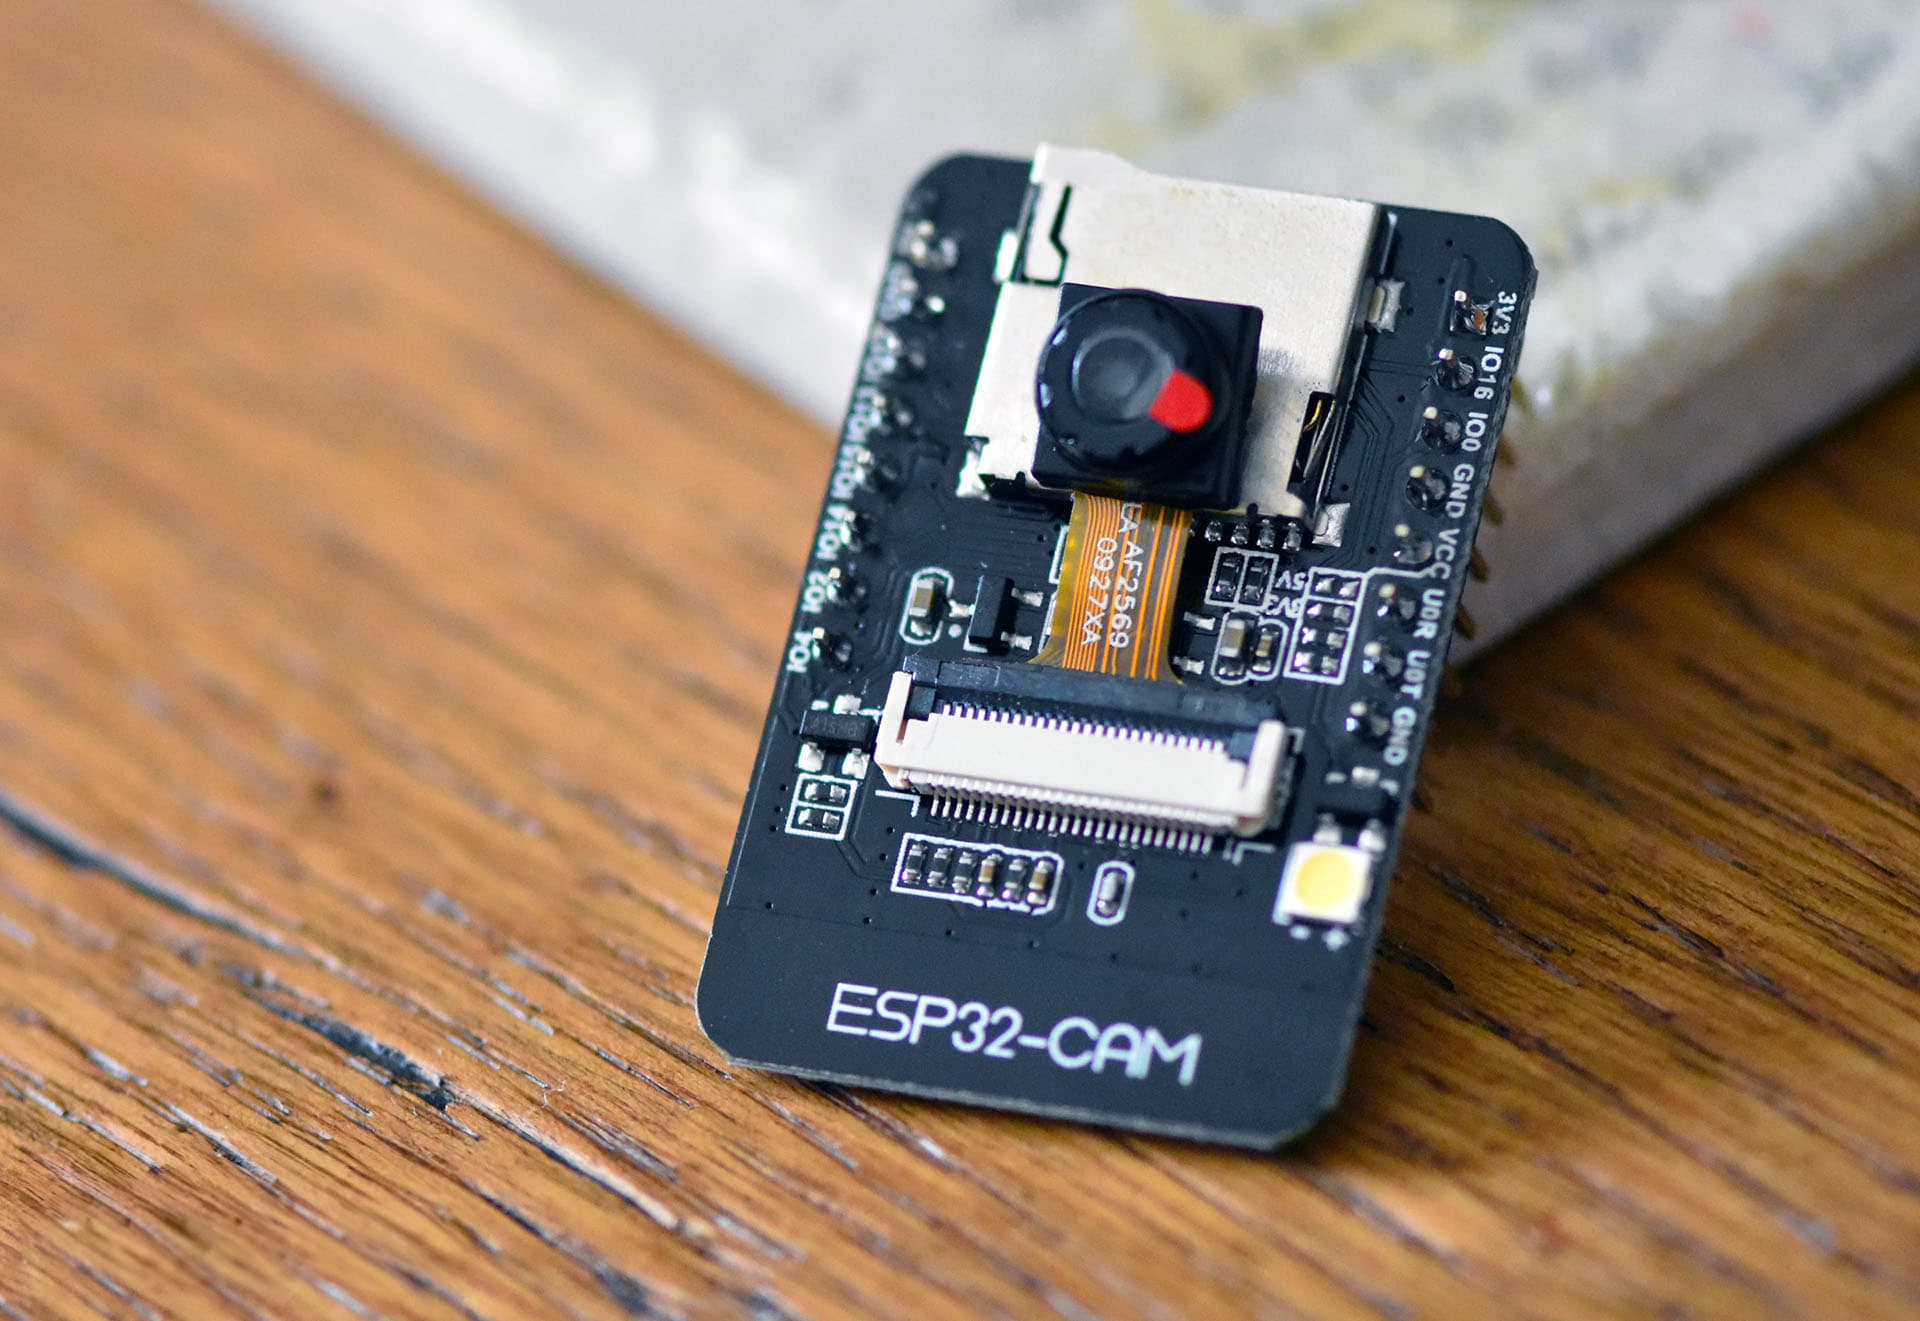
ESP32 Camera
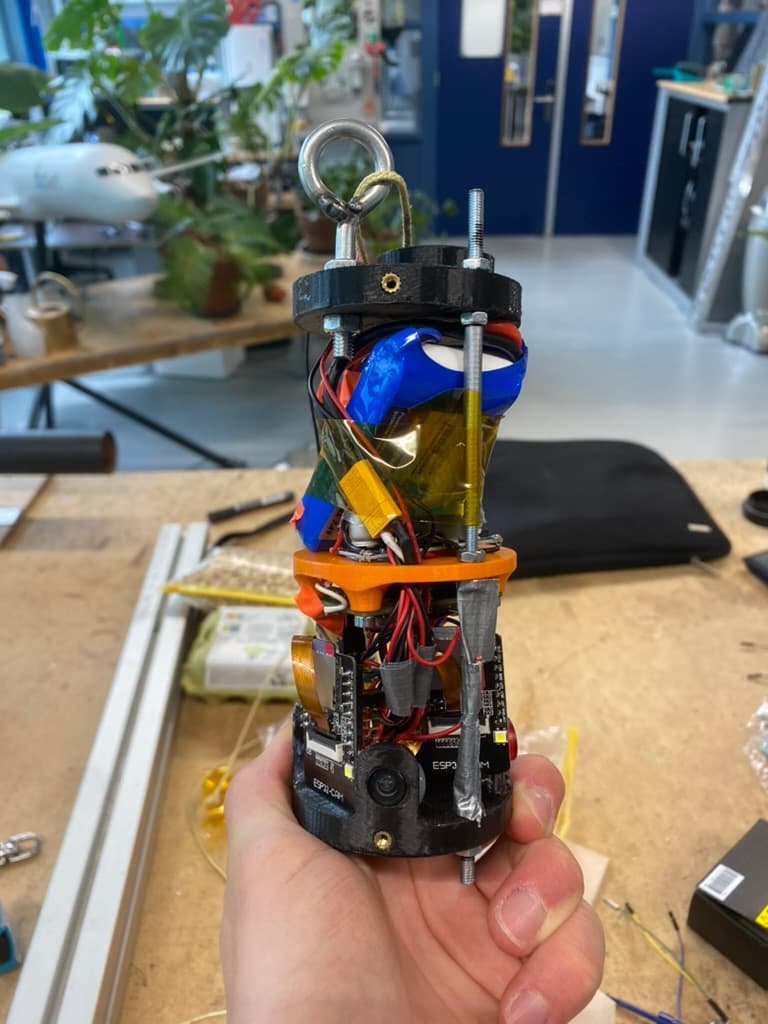
Finished Electronics Stack
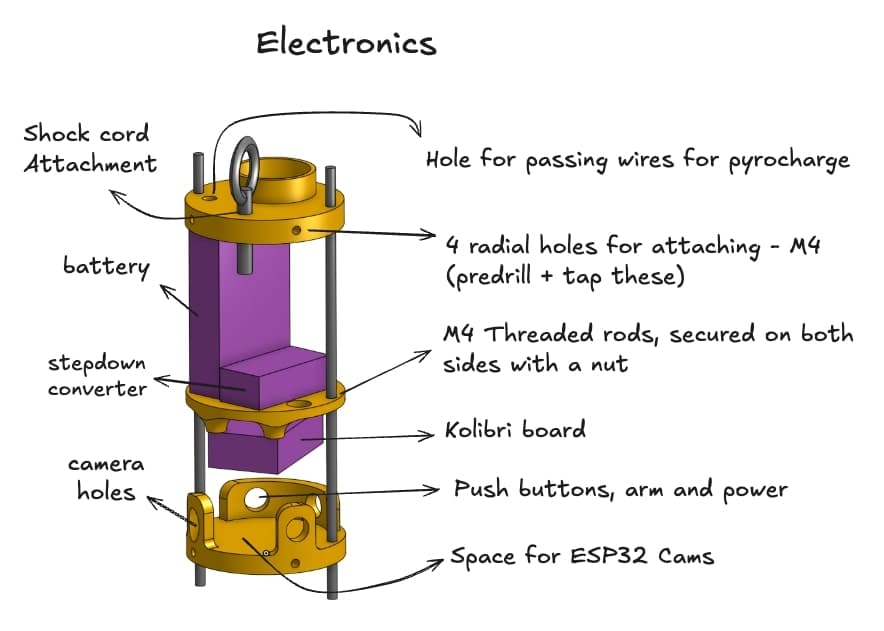
Diagram Electronics
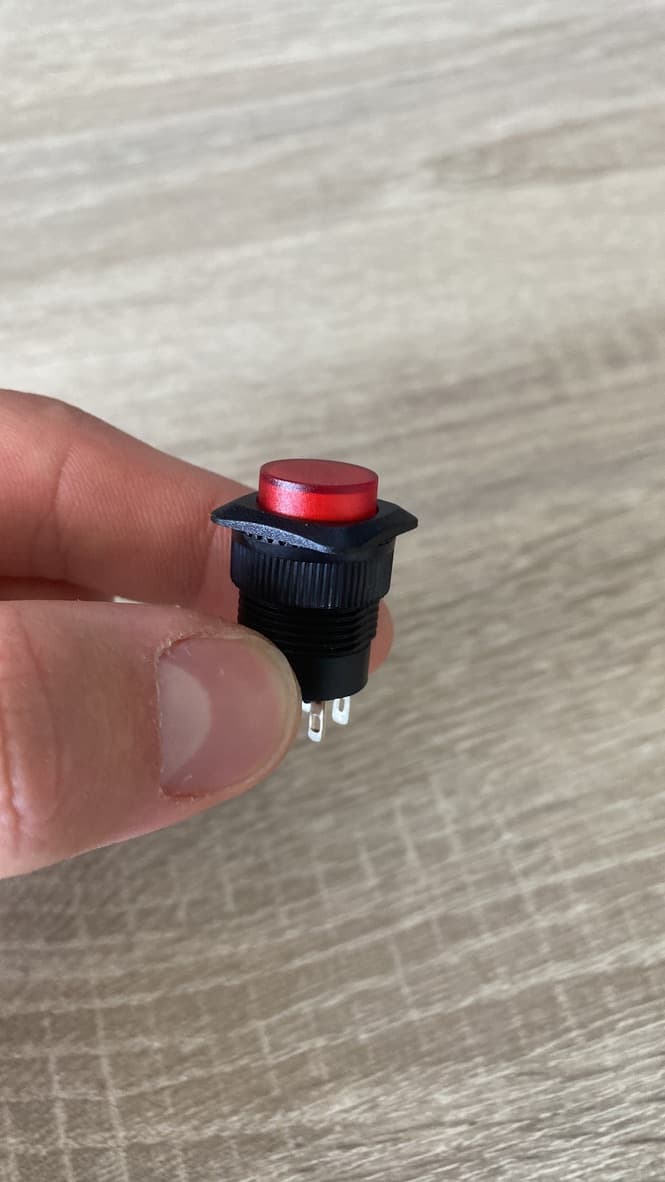
LED Switch
DARE provided us with a basic flight computer they call the "SRP Board". This simple boards provides power and arm switches, a pyro channel and some leds. Instead we decided to use the Kolibri, a board they built that is based on the RP2040 microcontroller, used in boards like the Raspberry Pi Pico. The Kolibri has more features, like a barometer, an IMU, GPS, flash memory, and most importantly for us: telemetry. So we can send data from the rocket to a ground station.
The Kolibri was really nice to work with. We could flash it's firmware with the arduino IDE and then change the settings via the Serial Monitor. The ground station was also the same Kolibri board but just with different firmware so it would be configured to act as a ground station.
As mentioned before, we used the Kolibri to record the flight data. It logged the data from the barometer, IMU and GPS. We unfortunately couldn't retrieve the data from the Kolibri after the flight, because the rocket crashed but luckily we had the live telemetry data it sent down during flight.
We decided to use two ESP32 modules as they are very cheap, available, and well documented, so very easy to work with. The two ESP32 Cam AI Thinker boards we used were connected to the battery with a stepdown converted to convert from the battery's 8.4 volt to 5 volt. (See the schematic above)
Launch and Apogee Detection
Launch/Apogee detection methods considered:
- Breakwire system (launch)
- Barometer readings (launch / apogee)
- IMU acceleration data (launch / apogee)
- GPS position tracking (launch / apogee)
We decided to use a breakwire system to detect the launch. The breakwire was a simple wire that was connected between the Kolibri and the launch rail. When the connection was broken, the Kolibri would go into flight state. We did the same thing for the ESP32 camera's. They used a separate breakwire, so the camera's would start recording when the connection was broken.
Barometer readings is also a way to detect launch, by seeing the pressure go down, it can detect launch. But barometers are mainly used to detect apogee. They read the pressure to figure out the height of the rocket in that instant. They can sense that the rocket is ascending by seeing a decrease in pressure. Once they sense an increase in pressure, they know the rocket is descending, so time to deploy the parachute.
Lastly there is the option to use GPS to compare your positions to detect launch or apogee. Or use the IMU to see the changes in acceleration to detect launch or apogee. GPS tends to be not so precise and reliable. And an IMU is very good for detecting launch but can struggle to detect apogee because of the chaotic movements and weightlessness the rocket experiences at apogee.
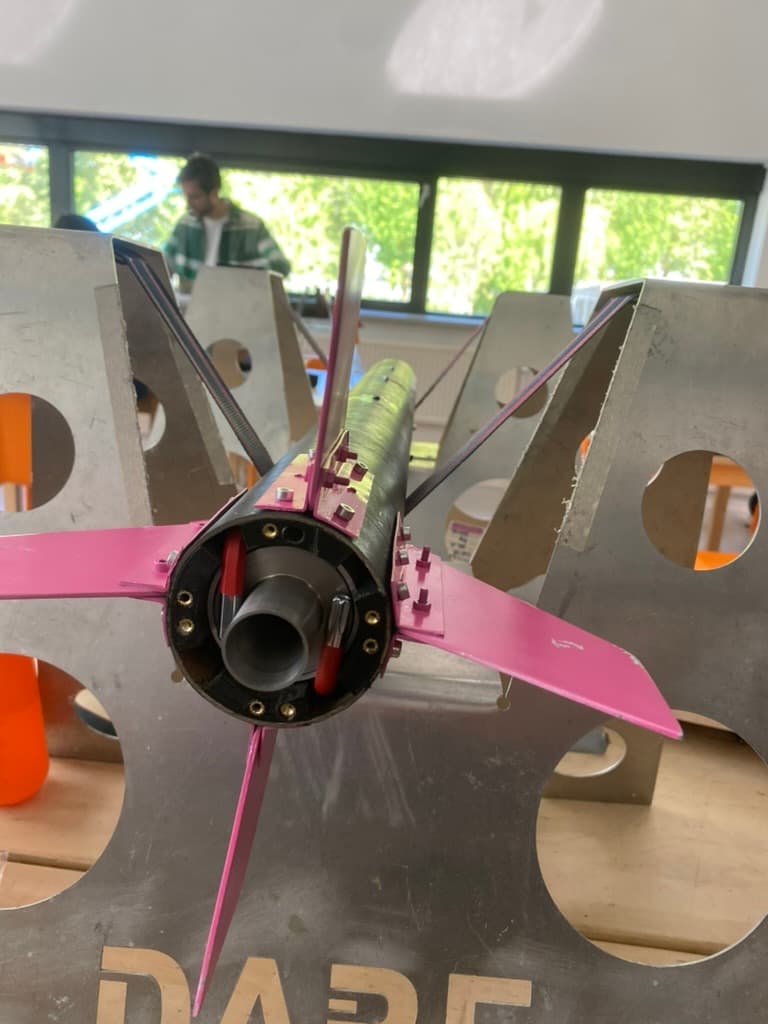
Upper Bulkhead, Lower Retainer Ring, and Launch Lugs
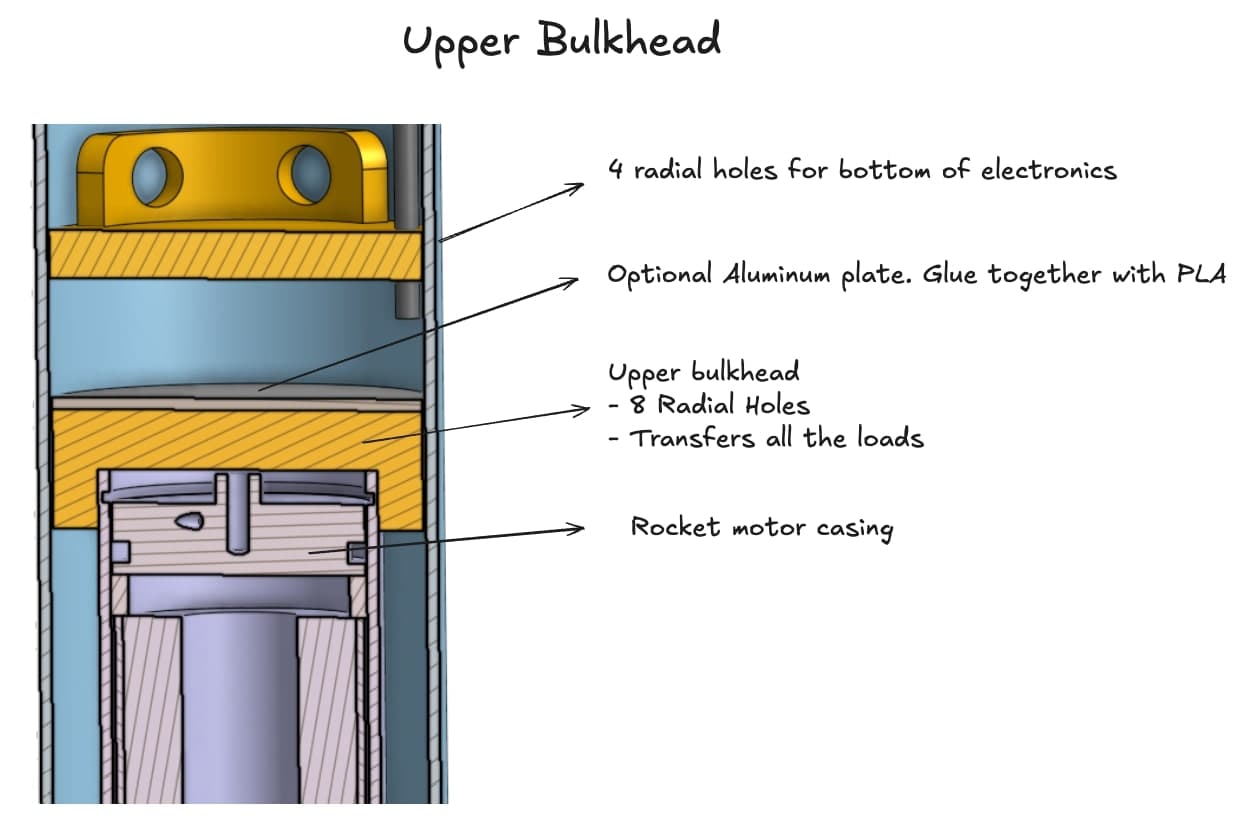
Bulkhead
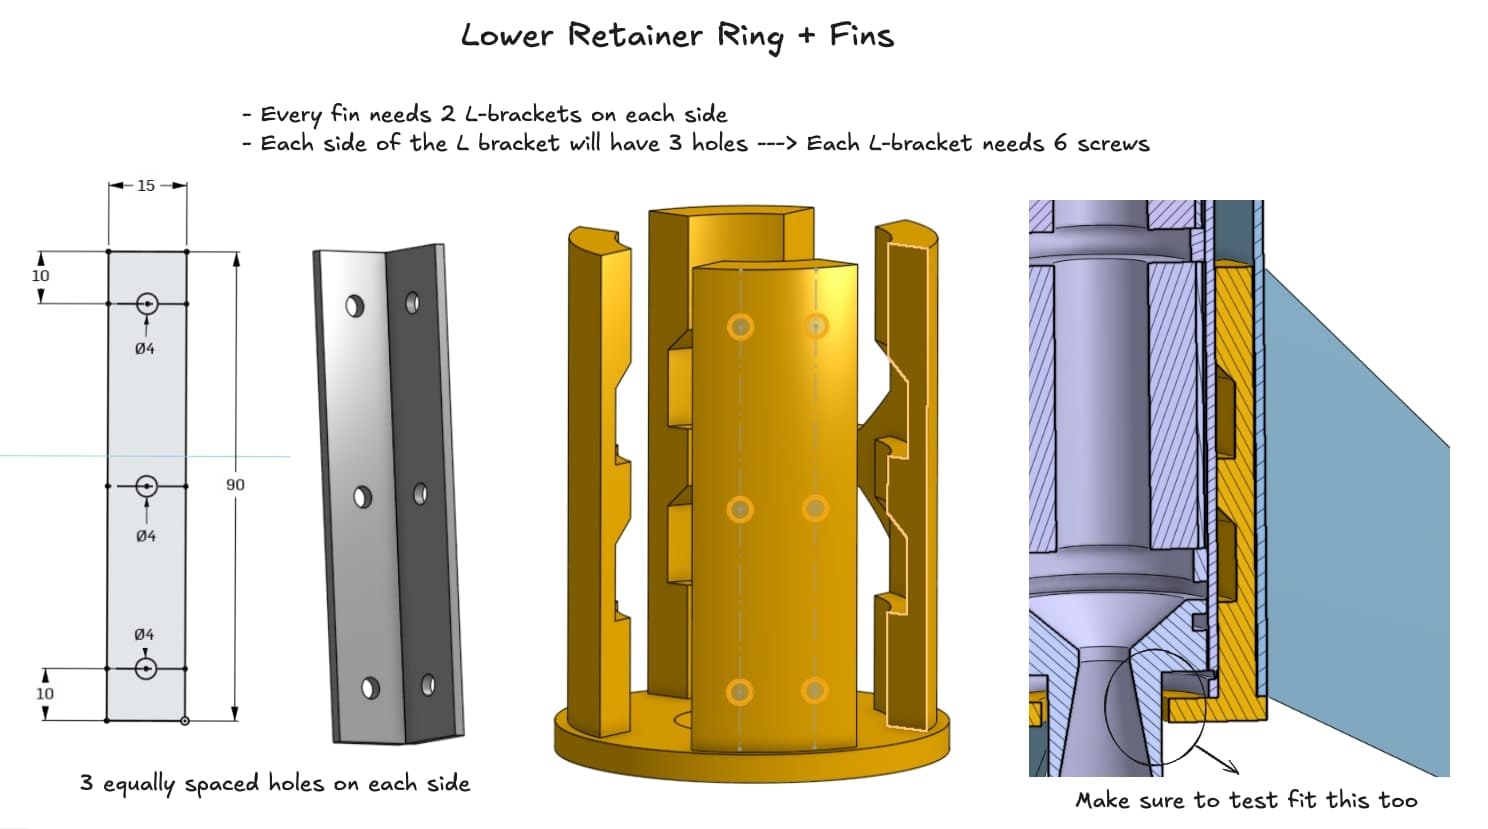
Retainer Ring + Fins
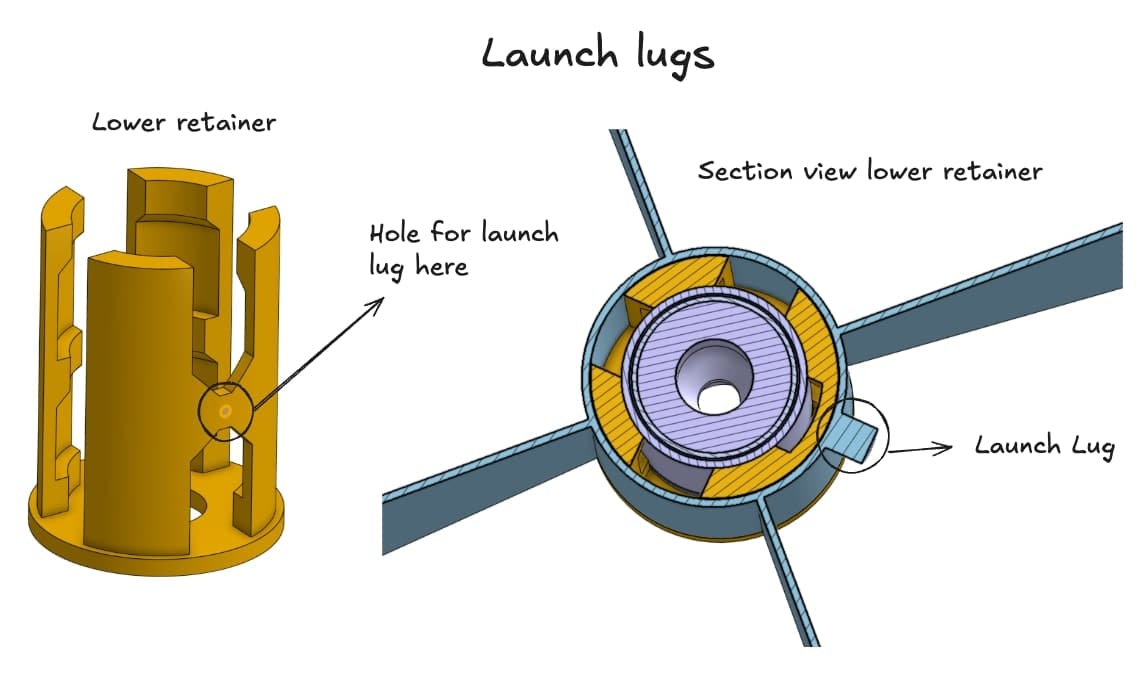
Launch Lugs
The rocket has 1 big bulkheads and retainer ring that are used to secure the rocket motor inside the rocket body. The bulkheads are transferred the force from the rocket motor to the rocket body. The retainer ring is used to secure the parachute to the rocket body.
Both the bulkheads and the retainer ring are made of 3D printed PETG plastic. The bulkhead is pretty thick, 3mm, and it has 8 radial bolts to transfer the force from the rocket motor to the rocket body. The lower retainer ring is mainly to keep the rocket motor centered in the tube and also secure it in place so it does not fall out. During flight itself all the loads are on the upper bulkhead because that is where the motor is pushing against.
The retainer ring is also the part that the fins are attached to with 6 M3 bolts for each fin. Small holes are pre-drilled and then the screws where tapped straight into the plastic. One of the launch lugs is also attached to the retainer ring. The other one is attached to the upper bulkhead.
Software
All design was done inside OpenRocket and the entire rocket was designed using Onshape, a cloud-based CAD platform, that allows for:
- Free access for all team members
- Real-time collaboration
- Version control and design history
- Easy sharing and review of designs
Programming ESP32s
I programmed the ESP32s using Cursor (VSCode) in C++ with PlatformIO. This is an extension that allows you to program the arduinos/ESP32s just the Arduino IDE. The code detects launch with the breakwire and starts recording the video. The video recording are actually individual images that are saved to an MJPEG file which is not readable by a normal video player. So I you have to use ffmpeg to convert the MJPEG file to an mp4-video.
Link to the Github repository: eliotgevers/SRP-Rocket-Cameras
Results
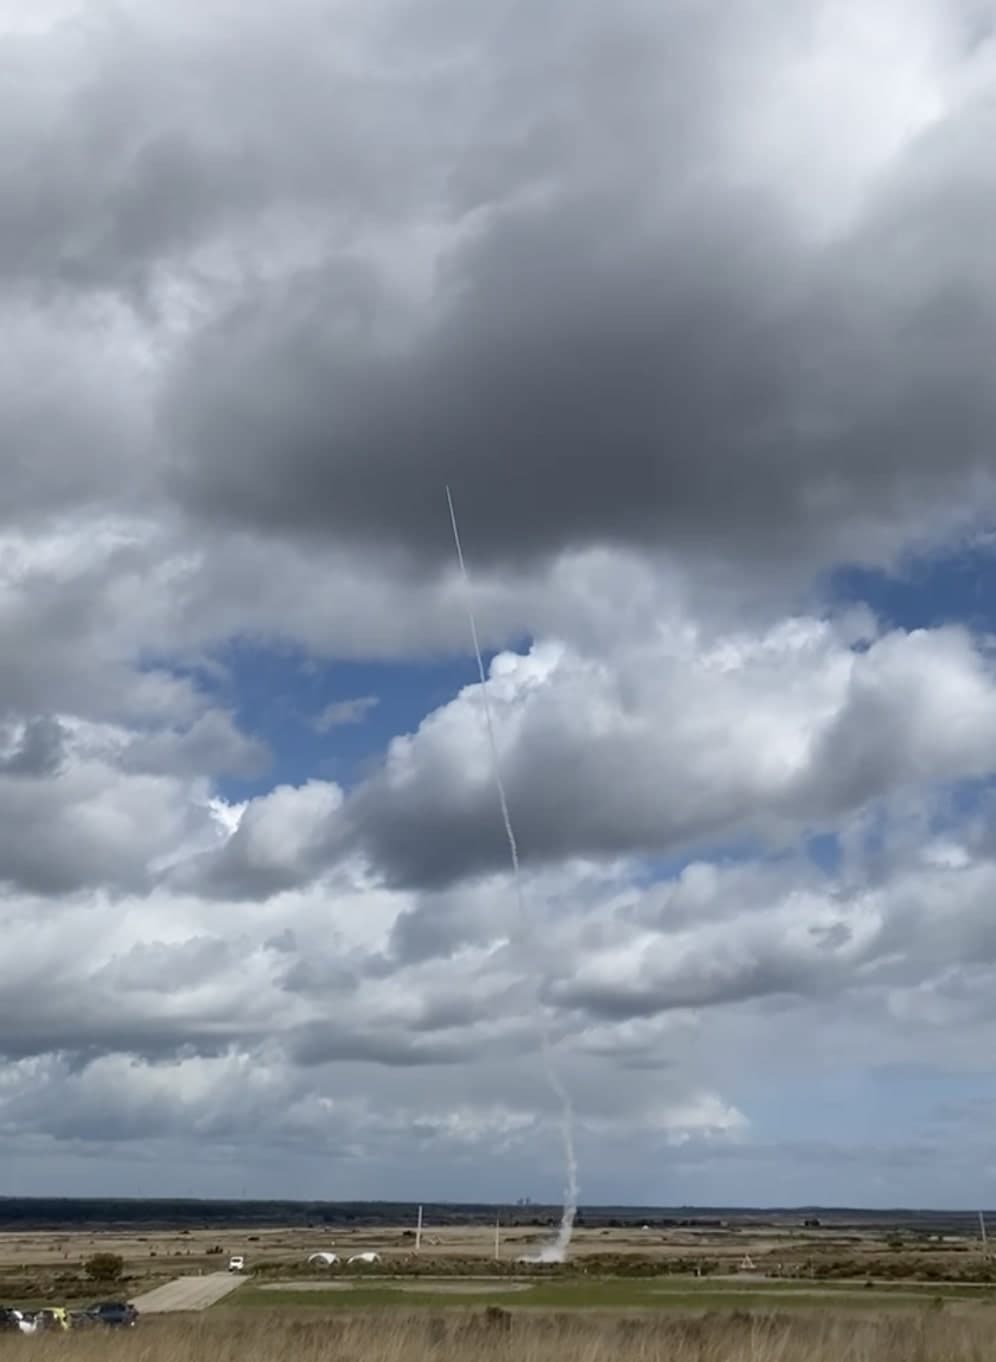
The rocket was launched successfully and reached an altitude of around 800 meters. But unfortunately the parachute did not deploy and the rocket crashed at 200 km/h into the ground and was not found again.
The logs we got back from the live telemetry showed that the flight computer tried to deploy the parachute at around 800 meters altitude. But the parachute did not deploy. This could have been a faulty connection, bad pyrotechnic charge, or another technical issue. Unfortunately we did not get any footage from the rocket, because it crashed.
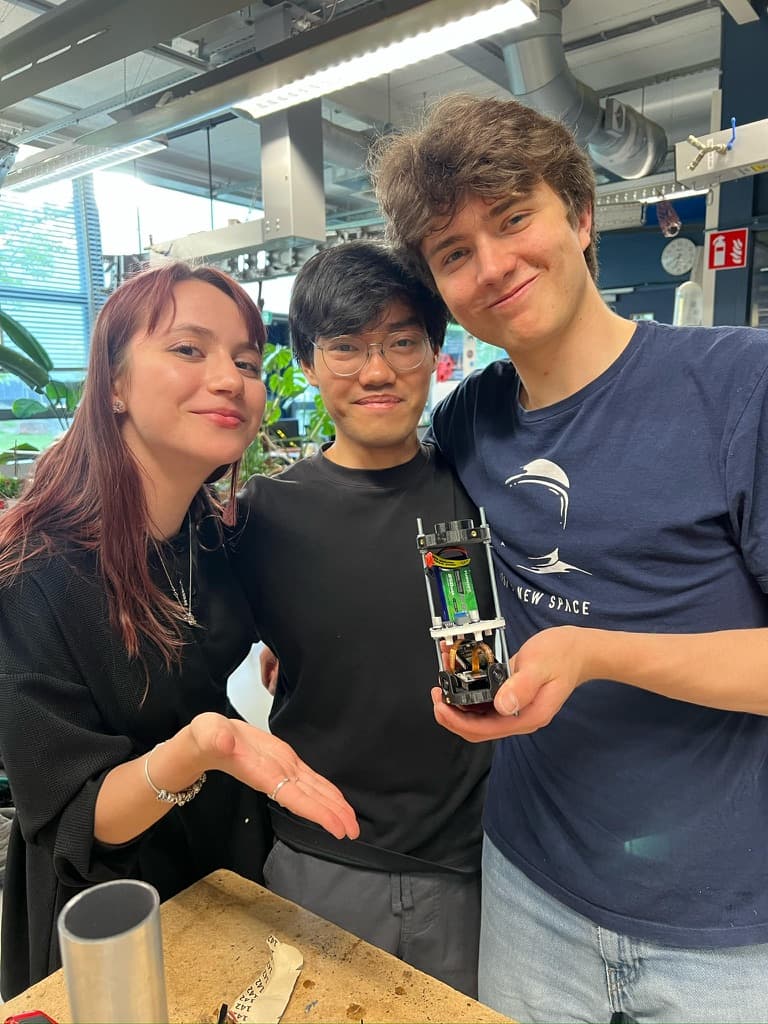
It was a very cool project to work on. It was a lot of fun to work with the team and to see the rocket take off. Here are some extra images:
Rocket Check
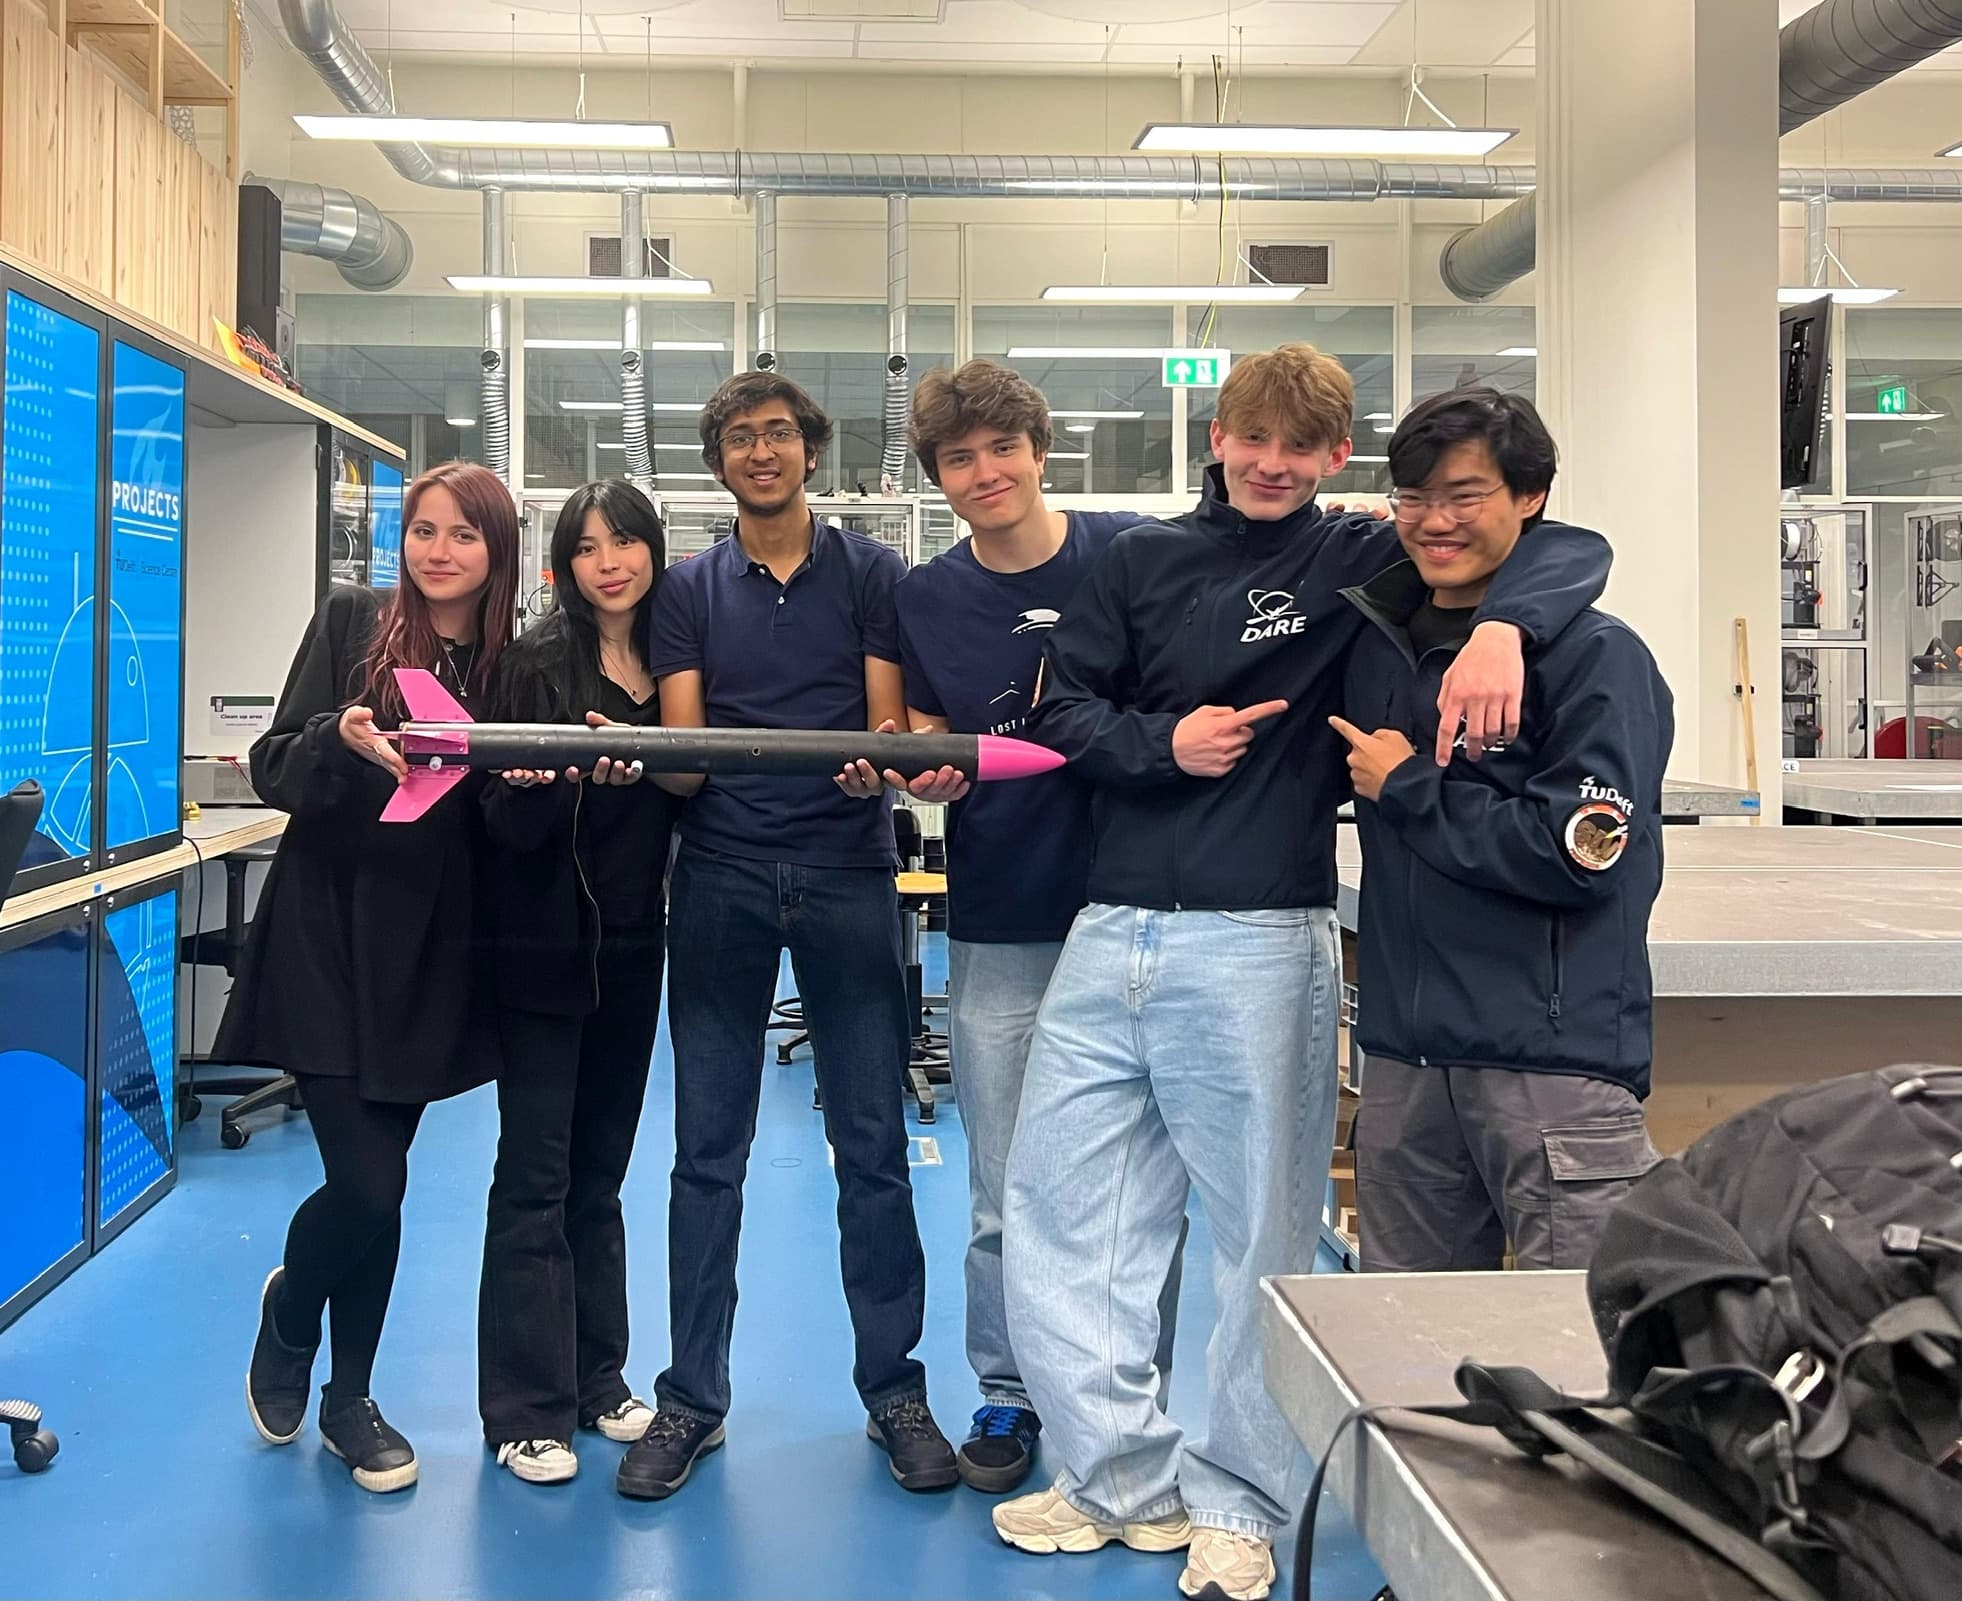
Team Picture
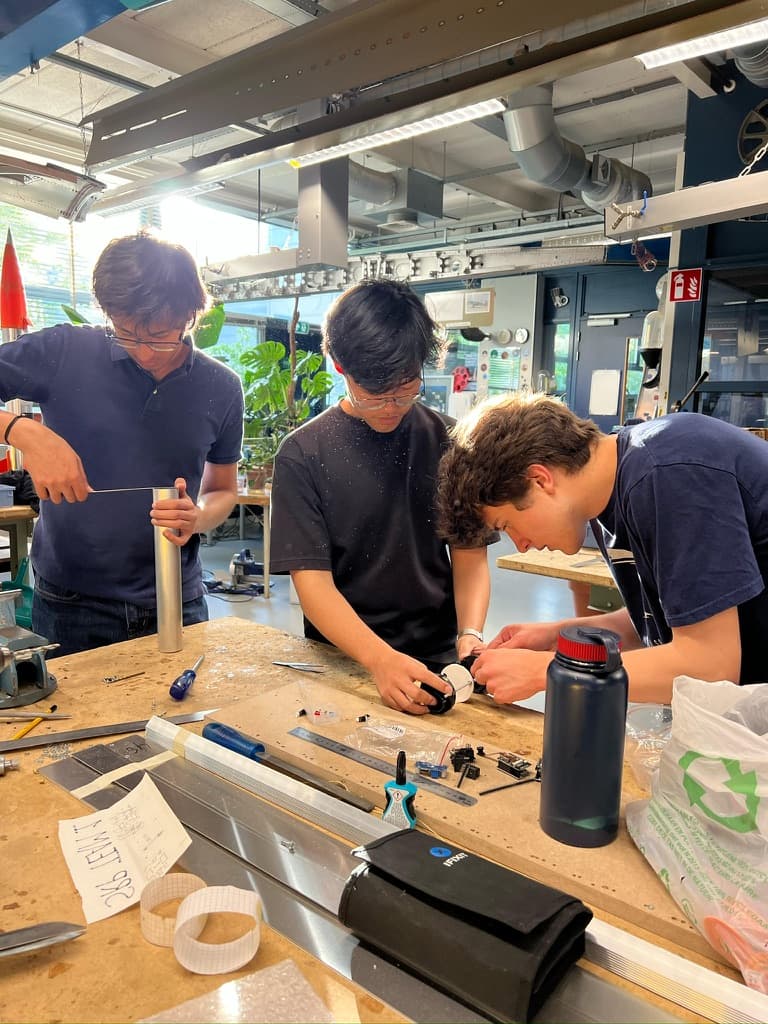
Working On Electronics
Presenting Electronics

Cool Dudes
Rocket Flying